
LDAPviewer provides a number of TLS Features. These features may be selected and configured using the TLS option of the Connection Profile when either the LDAPS protocol or an authentication method using TLS is selected.
One of the TLS available options is to send an X.509 certificate in a process that is frequently referred to as either mutual authentication - both the server and the client authenticate themselves using X.509 certificates - or Client Authentication - only the client sends an X.509 certificate. This feature is invoked by selecting an Access Type which contains the keyword Clent in the Connection Profile (specifically TLS+Client+Anonymous or TLS+Client+User+Password).
The Client Keystore Manager allows the user to create or delete a Client Keystore and import or delete certificates and their corresponding private keys as described in detail in subsequent sections. A Client Keystore is shared between all instances of LDAPviewer.
Notes:
When a Client certificate is sent during the TLS handshake (TLS initiation phase) outgoing data is encrypted with the private key associated with the client certificate. Private keys are stored in the Client Keystore and are high security items and should be password protected. The Client Keystore is initially created with a default password but this may be changed at any time using Change Password button. This password protects all the private keys in the Client Keystore.
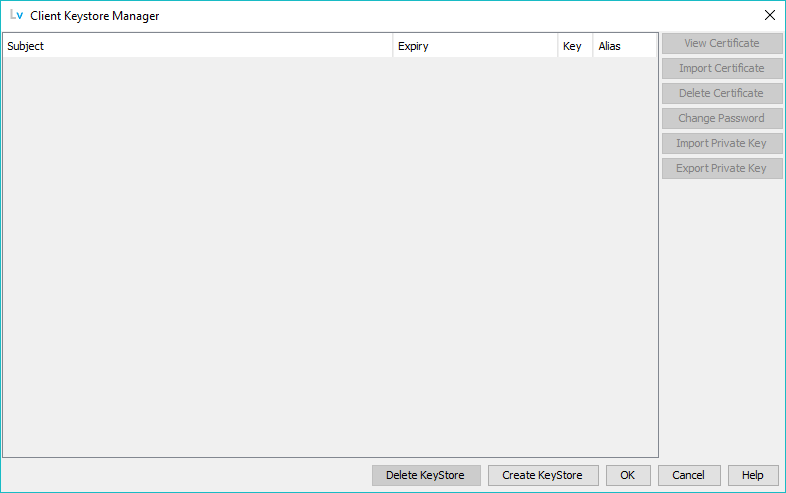
When the Client Keystore Manager Window is opened and no keystore has been configured the only button enabled is Create Keystore (apart from those used to close the window and obtain help) as shown:
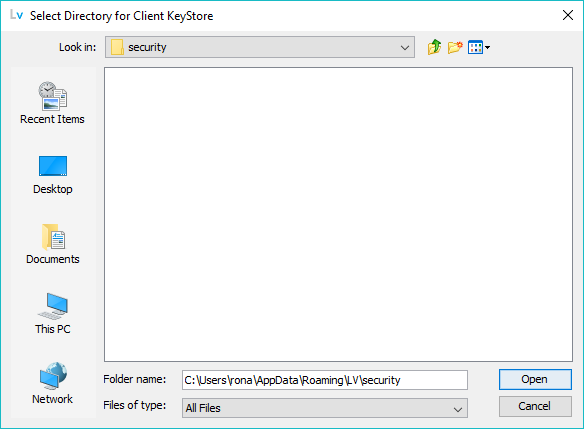
Clicking The Create Keystore button will prompt the user for a suitable location (which must have read and write access for LDAPViewer) for the Client Keystore. The keystore will be created with a fixed name of clientks.
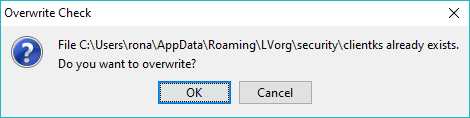
If the keystore already exists at the selected location (see Delete Keystore Button for possible reasons) the user will be prompted to overwrite it as shown:
Note: The Client Keystore created at clientks uses the standard Java Keystore (JKS) format and has a default password value of changeit. When used as a Client Keystore it will be populated with X.509 certificates and private keys which are extremely sensitive. Users are advised to change the default passwword using the Change Password button as soon as pratical.
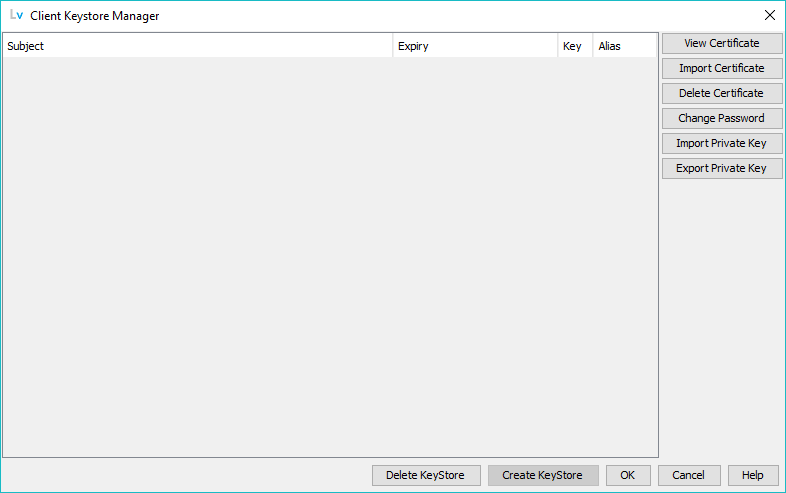
Once the empty keystore has been created all other buttons will be enabled as shown:
The function of all buttons is decribed below.
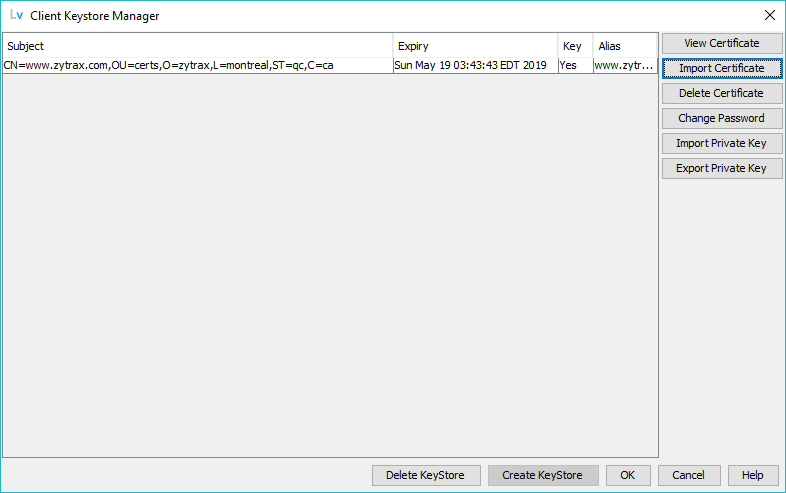
When a populated Client Keystore is loaded it will display a Window containing all the current certificates similar to that shown:
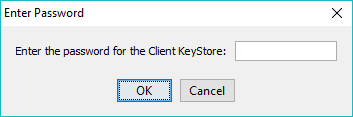
If the password has been changed from the default the user will prompted for the password whenever the Manage Client Keystore Window is opened as shown:
The certificates in the Keystore have a 4 column summary display as shown:

The columns are headed Subject (defines the entity covered by the certificate), Expiry (the date the certificate expires and will be rejected during validation by the server), Key (Yes indicates the certificate has an associated private key, No indicates the certificate does not have an associated key and will not be the used until one is provided) and Alias (a value used to uniquely identify the certificate/key pair within the keystore). Any certificate can be inspected in detail using View Certificate.
The Delete Keystore button may be clicked at any time. Connection Profiles which have been configured with an authentication method containing the keyword Client will silently fallback to their non-client equivalent (for example, TLS+Client+Anonymous will be handled as TLS+Anonymous).
The currently selected certificate's details are displayed. If no certificate is selected the click is silently ignored.
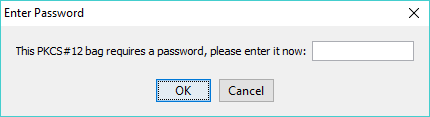
Clicking this button allows the user to select a certificate to be imported into the Client Keystore as shown:
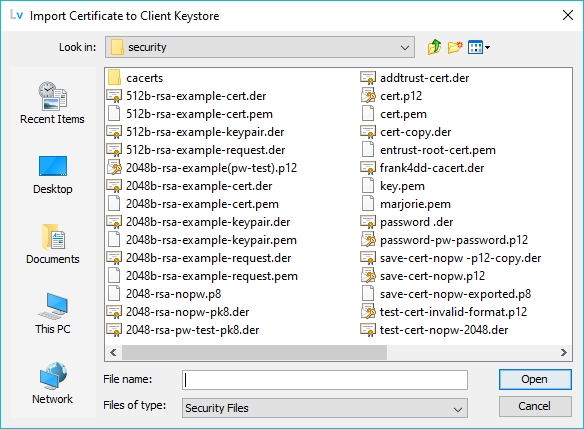
Certificates may be in .der, .pem, .crt, .cer, .pfx, or .p12 formats. A prompt may occur if the certificate is password protected. (In the example case the explanatory text indicates that a PKCS#12 bag structure from a .p12 file containing an X.509 certificate is secured with a non-empty password, but many other messages are possible depending on the file or containing structure type.):
If a single certificate exists in the selected file the following window is displayed:
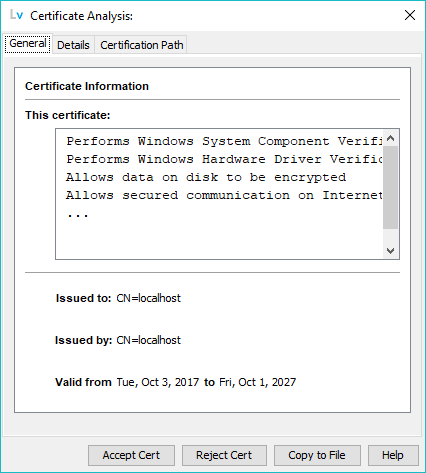
The certificate may be inspected as described here and the user may select Accept Cert (the certificate is copied into the Keystore) or Reject Cert (the certificate is not copied into the Keystore).
If two or more certificates are present in the selected file the user is prompted to select the appropriate certificate as shown:
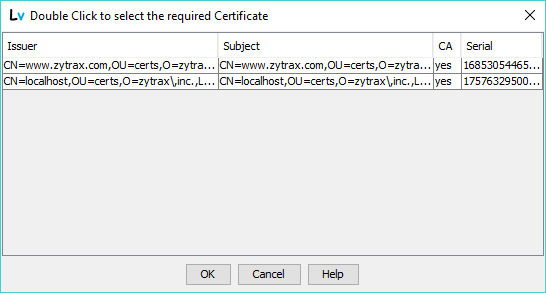
Selecting the required certificate followed by OK (or double clicking it) will display it and allow the user to accept or reject the chosen certificate. Cancel will terminate the Import Certificate operation.
Certain file types may include both a certificate and a private key - notably but not exclusively, .p12 and .pfx. If a private key is detected in the selected file the following prompt will be displayed:
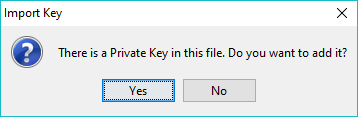
Selecting Yes will import the private key from this file, selecting No will ignore the key. The key may be subsequently imported from this or another file using the Import Key button.
Note: A certificate can only be used in mutual or Client authentication when it has both a certificate and an associated private key (the Key column has the value Yes).
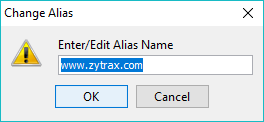
Certificates are identified within the Keystore using an alias (a unique text string). If the user attempts to import a certificate with the same alias as an existing certificate (LDAPviewer creates a default alias using the cn value of the certificates subject attribute) the following prompt will appear:
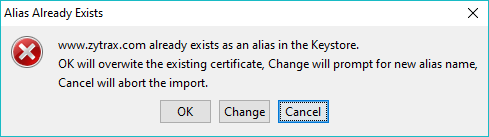
Clicking OK will overwrite the existing certificate/key entry. Clicking Cancel will terminate the import operation and clicking Change will prompt the user to change the alias value or abandon the operation:
Operational Note: Any number of client certificate/key pairs may be added to the Client Keystore. However, if more than one cert/key pair exists in the Client Keystore when the user connects using a profile whose authentication method contains the keyword Client the following prompt is displayed:
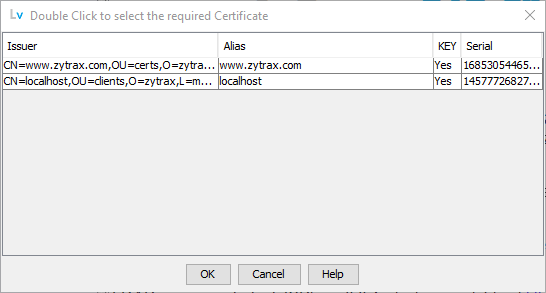
Either double clicking the required cert or selecting the cert and clicking OK will cause LDAPviewer to use the user selected certificate. Cancel will terminate the connection.
A user prompt identifying the selected certificate's alias is shown:
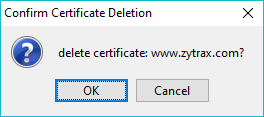
Yes will delete the certificate, No will leave the certificate in the Client Keystore.
The Client Keystore will contain both certificates and private keys. It is recommended that the user change the default password as soon as practical. The following window is displayed:
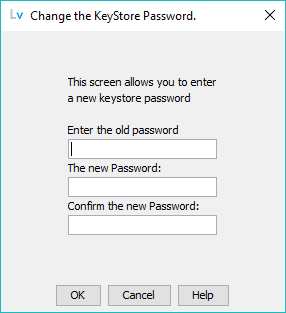
Recall that the default password used when the Client Keystore is initially created is changeit.
Will import a private key to be associated with the selected certificate entry. (If no certificate is selected the click will be silently ignored.) The operation may be used to add a new private key or overwrite an existing key.
Note: Private keys may also be imported from .pfx or .p12 files using the Import Cert button.
A standard file selection dialog is opened as shown:
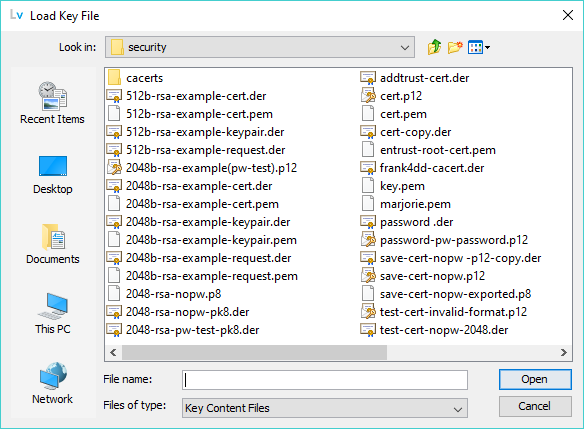
By default files with the suffix (extension) .p12, .pfx, .pem, .der, .key and .p8 are looked for in the target directory but using the All Files option of the drop-down menu at the foot of the dialog any file may be loaded.
If the certificate already has an associated private key (the Key column has the value Yes) the private key will silently overwrite the current key (there will be no user prompt). If a new key is being added the Key column will change its status from No to Yes on completion of the import operation.
The private key may be saved from the selected certificate/key pair in the Client Keystore. The private key is saved as a non-password protected PKCS#8 structure in either PEM or DER format based on the selected file suffix (extension). If saved with a suffix (extension) of .pem or .key it will be saved in PEM format (with a type of PRIVATE KEY), any other suffix (extension) will be saved in DER (binary) format. If saved as a DER file the recommended suffix (extension) is .p8.
The exported key file may be viewed using he View or Import Security File item on the Certificates menu.
This will remove the Client Keystore from all instances of LDAPviewer. The user is prompted to confirm deletion of the keystore as shown:
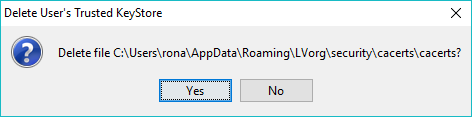
Selecting Yes will delete the keystore file and remove the Client Keystore from all instances of LDAPviewer. Selecting No will not delete the keystore file but will remove the Client Keystore from all instances of LDAPviewer. (The keystore file can be manipulated using the standard Java keytool utility.)
Writes all changes to the Client Keystore and closes the window.
If the user has made changes the following prompt is displayed:
Selecting Update Keystore will write all changes to the Client Keystore, Discard Changes will not write any changes and leave the Client Keystore in the same state as when this window was opened. In both cases the window is closed.
Displays this page.
© LV Project 2016. Creative Commons Attribution 4.0 International License.