
LDAPviewer optionally provides two views of any LDAP entry, a Table Editor view or an HTML Editor view. (This behavior can be controlled using the Editing Views (under the GUI options) in Preferences on the Options Menu.)
The HTML Editor view is controlled by HTML templates (.html or .htm files) stored in the templates directory. The appropriate template to use is defined by the objectClass to which it applies. Thus, if a template can be used to display an LDAP entry based on the objectClass organizationalPerson it will be stored in a subdirectory organizationPerson (subdirectory name is case insensitive). Template selection will start from the lowest STRUCTURAL objectClass in any hierarchy (if it exists) for the entry. Thus, if an entry is based on the objectClass inetOrgPerson (which is the lowest objectClass in the hierarchy consisting of inetOrgPerson->organizationalPerson->person) then the inetorgperson subdirectory will be searched first. The display template is selected in order of:
If the subdirectory for the lowest objectClass in the entry is not found (or there are no templates in this subdirectory) then the search process is repeated for next objectClass and so on. If all fails then the entry is displayed using the index.html template in the base templates directory which always exists. In addition all applicable templates for the entry will be listed in the HTML Editor Template Menu. By selecting a template from this menu the entry will be displayed in the format defined by the chosen template.
A number of templates are supplied with LDAPviewer covering commonly used objectClasses which may be used 'as is' or which may be used as a base for customized templates.
Notes:
HTML Edit Templates are selected in the following order:
The last selected form for this objectClass during this connection, if none were previously selected then:
From the subdirectory reflecting the lowest hierarchical objectClass (the one with the most SUPs) if not present the next objectClass in the hierarchy is searched and so on. If none are found the index.html template in the base template directory is used.
If a subdirectory for the objectClass is found then the index.html template is used and if not present the lowest alphabetic template is chosen (A.html before a.html).
A list of all available templates is created when a new connection is made. If templates are updated the changes will appear on the next use of the template. If, however, a new template is added (either in an existing objectclass subdirectory or a new objectclass subdirectory) then it will be necessary to create a new connection or issue a disconnect/connect sequence to force LAPviewer to find the new template/subdirectory.
Templates fall into three categories:
Certain Templates forms may be freely mixed where it makes sense, for example, a Display Template format may be used to display uneditble attributes of an entry while those attributes that are editable may use an Edit Template format. Additional Notes on these an other issues relating to the User Interfaces are illustrated.
Notes:
The HTML dialect currently supported is loosely based on HTML 3.2 with minimal CSS1 features. Almost all layout control is accomplished using tables rather than CSS. While this feature set is more than adequate for Display, Edit and New Entry templates, those used to modern HTML5 CSS based layouts may find it all rather retro.
A number of HTML templates use the old XML/XHTML compatible wheeze of closing, with />, all open tags such as <image>, <input> and others. This is not necessary and their presence in some distributed templates is an artifact of a time long since past.
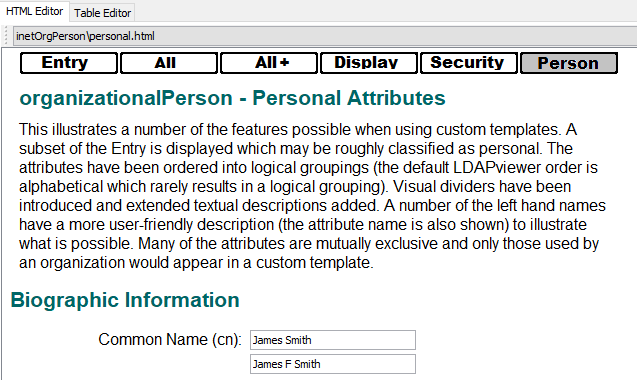
Template names are chosen by the developer and, in general should be as descriptive as possible to allow the end user to intuitively select an appropriate template. Thus, a template that displays and allows editing of personal details would typically be called personal.html while one which focuses on editing equipment details could well be called, surprisingly, equipment.html.
While templates are typically used to edit LDAP entries they are HTML documents and normal HTML features such as menu bars and descriptive/explantory texy may be included as required. See the additional notes on User Interfaces.
HTML templates allow editing of text attributes in the expected manner for normal HTML forms (in-situ edit). However, when the user opts to edit certain fields the HTML Editor invokes specialized editors. Currently these specialized editors cover passwords, audio, jpegPhoto, binary, boolean, certificate, time, postal address and long text strings (in additional in specialized cases where it makes sense some attributes are edited as group attributes). Note: The Table Editor handles these attributes in a similar manner.
The following shows a typical HTML Edit template illustrating many aspects of template design and flexibility. The various sections in this template are described further in the following sections:
Note: The following information may give the impression that creating templates is a lengthy process. While creating a tailored HTML form with copious explanatory text can indeed take serious effort there are many ways to speed up the process:
Edit an existing template. The layout notes describes where to find the variuus resources, including teplates, distributed with, and used by, LDAPviewer.
Use a Minimal Template design to get started.
Copy a displayed HTML form. The Copy HTML to Clipboard item on the Options menu will copy the currently displayed form to the system clipboard where it may be pasted into an HTML editor or other tool and edited as appropriate.
<html>
<head>
<title>inetOrgPerson: Index Template</title>
<style type="text/css">
<!--
h1 {  font-family: Arial, Helvetica, sans-serif; color: #006666}
body {  font-family: Arial, Helvetica, sans-serif; background-color:#ffffff;}
.red {color:red;}
.blue {color:blue;}
.green {color:green;}
-->
</style>
</head>
<body>
  <table>
    <tr>
      <td align="center" valign="top" colspan="2"  width="430">
        <table border="0" cellpadding="0" cellspacing="0" width="300">
          <tr valign="top">
            <td><img name="main" src="../images/main2.gif" width="100" height="20" border="0"></td>
            <td><a href="address.html"><img name="address" src="../images/address.gif" width="100" height="20" border="0"></a></td>
            <td><a href="other.html"><img name="other" src="../images/other.gif" width="100" height="20" border="0"></a></td>
          </tr>
        </table>
        <h1>inetOrgPerson - Sample</h1>
      </td>
    </tr>
  </table>
<form name="Form">
  <table>
    <tr>
      <td align="right" valign="top"  width="200" class="blue">Common Name:</td>
      <td width="230">
        <input type="text" name="cn" value="">
      </td>
    </tr>
    <tr>
      <td align="right" valign="top"  width="200" class="red">Given Name:</td>
      <td width="230">
        <input type="text" name="givenName" value="">
      </td>
    </tr>
    <tr>
      <td align="right" valign="top"  width="200">Surname:</td>
      <td width="230">
        <input type="text" name="sn" value="">
      </td>
    </tr>
    <tr>
      <td align="right" valign="top"  width="200">Initials:</td>
      <td width="230">
        <input type="text" name="initials" value="">
      </td>
    </tr>
    <tr>
      <td align="right" valign="top"  width="200">Title:</td>
      <td width="230">
        <input type="text" name="title" value="">
      </td>
    </tr>
    <tr>
      <td align="right" valign="top"  width="200">Address:</td>
      <td width="230">
        <textarea name="postalAddress" rows="4"></textarea>
      </td>
    </tr>
    <tr>
      <td align="right" valign="top"  width="200">Email Address:</td>
      <td width="230">
        <input type="text" name="mail" value="">
      </td>
    </tr>
    <tr>
      <td align="right" valign="top"  width="200">Employee Type:</td>
      <td width="230">
        <select name="employeeType">
          <option value="human" selected>Approximately Human</option>
          <option value="almost">Almost Human</option>
          <option value="borg">Barely Human</option>
          </select>
      </td>
    </tr>
    <tr>
      <td align="right" valign="top"  width="200">User Password:</td>
      <td width="230">
        <input type="password" name="userPassword" value="">
      </td>
    </tr>
    <tr>
      <td align="right" valign="top"  width="200">Locality Name:</td>
      <td width="230">
        <input type="text" name="l" value="">
      </td>
    </tr>
    <tr>
      <td align="right" valign="top"  width="200">Telephone Number:</td>
      <td width="230">
        <input type="text" name="telephoneNumber" value="">
      </td>
    </tr>
    <tr>
      <td width="200"></td>
      <td width="230">
        <input type="submit" name="Submit" value="Submit">

        <input type="reset">
      </td>
    </tr>
  </table>
</form>
</body>
</html>
The following snippet from the file above is commented (lines beginning with # which must not appear in any HTML template) to emphasize key points:
# minimal HTML document opening section
# no requirement for DOCTYPE, or meta tags, title is optional

<html>
<head>
<title>inetOrgPerson: Selected Attributes</title>

# minimal CSS1 embedded stylesheet with standard escape sequences
# typically used for formatting tags as shown
# but class name formatting is supported as shown with
# limited support for named colors (see HTML 3.2 Spec)

<style type="text/css">
<!--
h1 {  font-family: Arial, Helvetica, sans-serif; color: #006666}
body {  font-family: Arial, Helvetica, sans-serif; background-color:#ffffff;}
.red {color:red;}
.blue {color:blue;}
.green {color:green;}
-->
</style>

# standard HTML close head section, start body section

</head>
<body>
The following snippet from the file above is commented (lines beginning with #, which must not appear in any HTML template):
# This snippet illustrates the use of standard HTML to enhance the
# user's experience. In this case a series of hyperlinked images is
# used to allow the user to navigate to additional forms.
# This section plays no functional role in the template, it is eye candy.
# NOTE: Tables are the only reliable layout method in HTML 3.2.

<table>
    <tr>
      <td align="center" valign="top" colspan="2"  width="430">
        <table border="0" cellpadding="0" cellspacing="0" width="300">
          <tr valign="top">
            <td><img name="main" src="../images/main2.gif" width="100" height="20" border="0"></td>
            <td><a href="address.html"><img name="address" src="../images/address.gif" width="100" height="20" border="0"></a></td>
            <td><a href="other.html"><img name="other" src="../images/other.gif" width="100" height="20" border="0"></a></td>
          </tr>
        </table>
        <h1>inetOrgPerson - Sample</h1>
      </td>
    </tr>
  </table>
Notes:
The use of a hyperlink HTML menu bar, as shown in the above snippet, is a powerful way to customize the users experience and is discussed futher in later sections.
The following snippet from the example Edit Template is commented (lines beginning with #, which must not appear in any HTML template):
Note: Template generation can be totally customized as described below or two Minimal Templates may be used where no customization is required.
# HTML form start. The name= attribute must be present but the actual name is
# not important except for the special name new-entry (see Entry Creation Templates)

<form name="Form">

# classic table layout for forms

  <table>
    <tr>

      # The left hand table cell showing the text that will appear as a user prompt.
      # In this case the class="blue" HTML attribute will cause the text to appear in blue,
      # by default (no class= attribute) it will appear in black or whatever color
      # was defined in the CSS body definition.
      # The text displayed (in this case Common Name) is not related in any
      # way to the LDAP attribute name and may be as descriptive as required, alternatively,
      # it may be the standard LDAP attribute name (or alias).

      <td align="right" valign="top"  width="200" class="blue">Common Name:</td>

       # This defines the right hand table cell to contain an input box of type="text"
       # in which the user may add, edit or enter textual data.
       # The name="cn" HTML attribute defines the LDAP attribute name that will be used
       # to populate the value="" HTML attribute of this table cell, in this
       # case the value of the LDAP attribute cn in the current entry. If multiple
       # cn values exist, the right hand cell will be replicated to accomodate them, if
       # the attribute does not exist in the LDAP entry being displayed an empty input box
       # will be displayed. LDAP Attribute names used in the name= field are not case sensitive.
       # NOTE: the non-standard HTML attribute add="X" if present in an input tag of
       #       type="text" will cause the HTML Editor to create an additional X empty
       #       input boxes unless the attribute is single-valued.

        <td width="230">
        <input type="text" add="2" name="cn" value="">
      </td>
    </tr>

    <tr>
      <td align="right" valign="top"  width="200">User Password:</td>
      <td width="230">

        # Shows the use of the type="password" HTML attribute being used to
        # invoke a masked password box for the standard userPassword LDAP attribute
        # in this case but could be used for any attribute where masked editing
        # is required.

        <input type="password" name="userPassword" value="">

        # This illustrates the use of type="hidden" fields which can be used,
        # for example, when using a template to create a new entry or when
        # a particular attribute value is always required when an entry is updated.
        # If value="" HTML Editor will fill in the value(s) for the LDAP attribute
        # defined in the name= field from the current entry (or leave empty if the
        # attribute does not exist). If value= is not empty (""), as in the example
        # below, it will be left unchanged (this is true for all input types not just
        # type="hidden") and can be used as a hint or prompt.

        <input type="hidden" name="objectClass" value="inetOrgPerson">
      </td>
    </tr>

    <tr>
      <td align="right" valign="top"  width="200">Address:</td>
      <td width="230">
        # illustrates the use of <textarea> to allow room for
        # editing larger fields
        <textarea name="postalAddress" rows="4"></textarea>
      </td>
    </tr>

    <tr>
      <td align="right" valign="top"  width="200">Employee Type:</td>
      <td width="230">

        # This illustrates the use of select to limit the choices
        # available to the user for a particular attribute (which would be
        # typically implementation specific). The technique can also be used
        # to eliminate nuisances such as spelling errors.
        # The user sees the descriptive text but the value= corresponding
        # to the selected text is used to update the entry.
        # If the attribute exists in the entry and its value matches
        # one of the value= fields then HTML editor overrides the HTML template
        # selection (if more than one match exists, the last one is used).
        # NOTE: use only for single-value LDAP attributes or where a multi-valued
        #       attribute is known to have only a single value

        <select name="employeeType">
          <option value="approx" selected>Approximately Human</option>
          <option value="almost">Almost Human</option>
          <option value="borg">Barely Human</option>
          </select>
      </td>
    </tr>
Notes:
Only those LDAP attributes whose name appears in a name="ldap-attribute-name" HTML attribute (within an HTML <input> tag) will be displayed in the HTML Edit template. All other attributes present in the LDAP entry will not be displayed. This allows HTML templates to act as filters and be customized for a particular user group, displaying (and implicity allowing the option of editing) only those LDAP attributes of interest or those that LDAP server ACL permissions allow to be edited. Styling (class= tags) may be used, for example, color, to add visible clues to importance, usage or other characteristics.
The HTML template format allows the LDAP attribute name to be replaced with customized text if so desired, thus allowing descriptive (multi-line using <br> tags) text to be presented to the template user reflecting or describing, perhaps, application specific functionality.
It is possible to define a name="ldap-attribute-name" in an HTML template that is not valid for a given objectClass, this may occur due to an error (misspelling) or where a template, used for one objectClass, is replicated for use by another, almost identical, objectClass. In these cases the HTML editor will silently ignore the <input> tag sequence.
The non-standard HTML attribute add="X" (where X is a numeric value) may be optionally added to any INPUT tag. The editor will add X empty INPUT tags (for the same name="attribute-name") to allow new values to be added. If the INPUT tag is not used (remains empty) when the form is submitted it will be discarded - only attributes containing valid (non-empty) data will be used during a Submit operation.
<TEXTAREA> tags are fully supported for editing longer fields such as postalAddress. However, HTML Editor will also allow such fields to be displayed using a standard INPUT tag. In this case the input box will contain the text (long string), selecting this field for editing (double-click) will popup an extended multi-line edit window (with copy and paste buttons) and, in the case of the postalAddress attribute, special handling for the $ separator format.
<SELECT> tags can be used to support a wide variety of application specific uses (limiting user selections, avoidance of spelling or other data entry errors, boolean values and so on) for any attribute type. The values defined in the OPTION value= HTML attribute are case preserved when the Submit function is invoked. It is recommended that <SELECT tags always be used for boolean LDAP attributes, however, if a normal INPUT tag is used for a boolean attribute then, if selected for editing, it will popup a specialised boolean editor.
The following snippet from the file above is commented (lines beginning with # which must not appear in any HTML template):
<tr>
<td width="200"></td>
<td width="230">
# This displays a button labelled "Submit" which,
# when clicked, will cause the HTML editor to initiate an
# update of the current LDAP entry with any changed attribute
# values. If no values have changed no LDAP operation will result.
<input type="submit" name="Submit" value="Submit">
# space between buttons
# This displays a button labelled "Reset" which,
# when clicked, will cause the HTML Editor to
# reset all fields back to their original values
# (all editing changes will be lost). This operation
# uses the original entry values read from the server
# and does not cause an additional server operation.
<input type="reset">
</td>
</tr>
</table>
</form>
Notes:
Only those form fields containing values will be used to update the server on Submit. Specifically, all empty fields will be discarded. Thus, to delete a specific attribute or attribute value, simply delete its contents in the form.
The following snippet from the file above is commented (lines beginning with # which must not appear in any HTML template):
# trivial closing of the body and html sections
# following the form close. If required, additional eye candy
# could be inserted here and would play no functional role in the template
</body>
</html>
To simplify generating HTML Edit Templates (and New Entry Templates) where all the attributes are editable a minimal FORM may be contructed with a single hidden INPUT tag defining the objectClass and containing the non-standard HTML attribute attributes="Y", where Y may take the value entry (display all attributes in this entry) or all (display all allowed attributes for the defined objectClass or objectClass hierarchy). A classic two column table layout is used in both cases and the left-hand cell will be populated with the LDAP attribute name. The following snippet shows this feature in action:
Note:
These mimimal forms do not allow any customization of attribute names or the addition of text but will generate HTML for all the attributes. The Copy HTML to Clipboard item on the Options menu can be used to copy any currently displayed form to the system clipboard where it may be pasted into an HTML editor or other tool and edited as appropriate.
<form name="Form">
# classic table layout for forms
<table>
<tr>
# The left hand table cell showing the text that will appear as a user prompt.
# When using the attribute="Y" feature any values are ignored and the LDAP
# attribute name is substituted
<td align="right" valign="top" width="200" class="blue">:</td>
<td width="230">
# A single INPUT tag of type="hidden", name="objectClass" and value"required-objectClass"
# the attributes="Y" tag may take the value "all" (all possible attributes for objectClass)
# or "entry" (display only those in the current entry). This may optionally used with the
# add="X" tag as shown in the example.
# NOTE: the non-standard HTML attribute add="X" if present in an input tag of
# type="text" will cause the HTML Editor to create an additional X empty
# input boxes unless the attribute is single-valued.
<input type="hidden" attributes="all" add="2" name="objectClass" value="inetOrgPerson">
</td>
</tr>
<tr>
<td width="200"></td>
<td width="230">
<input type="submit" name="Submit" value="Submit">
# space between buttons
<input type="reset">
</td>
</tr>
</table>
</form>
New entries may be created with HTML templates. In this case the typical user interface would be to use a hyperlinked HTML menu at the top of a standard HTML template with appropriate text or graphic buttons labelled to indicate the function (illustrated in the Edit Template above. Clicking the oppropriate hyperlink may bring up any other HTML Edit template or it could bring up an Entry Creation Template. The following annoted snippet shows the FORM section (all other sections are as described for Edit Templates) to create a new entry using the inetOrgPerson objectClass and illustrates the major features used in entry creation and discusses some of the issues involved. Imaginative readers will doubtless think of other possible uses.
# the form name must be "new-entry" (case insensitive) to indicate a new entry
# is being created
<form name="new-entry">
  <table>
    <tr>

      # since the cn attribute is MUST for inetOrgPerson it has been
      # highlighted using an appropriate styling (class="red") attribute
      # this is eye-candy and not a requirement

      <td align="right" valign="top"  width="200" class="red">Common Name:</td>
      <td width="230">
        <input type="text" name="cn" value="">

        # hidden tag indicates the objectClass(es) to be used
        # in this case inetOrgPerson in the value= HTML attribute, if an AUXILIARY class
        # is required add an additional hidden INPUT tag (and also
        # add any additional INPUT tags for its (their) MUST attribute(s))
        # This does not have to be hidden but avoids the user trying
        # to edit the field

        <input type="text" name="objectClass" value="inetOrgPerson">

        # this must-be-hidden attribute contains the name="new-entry" HTML attribute
        # to indicate it creates an entry and the value= HTML attribute can contain
        # either a base DN to which the naming attribute will be added (see next attribute)
        # In the example case this will be uid=id,ou=people,dc=example,dc=com
        # or the keyword "current" which will use the DN of the current entry
        # in the HTML editor and add the naming attribute(s) from this form

        <input type="hidden" name="new-entry" value="ou=people,dc=example,dc=com">
      </td>
    </tr>

    <tr>
		<tr>
      <td align="right" valign="top"  width="200" class="blue">ID:</td>
      <td width="230">

        # the uid attribute has been designated as the naming attribute
        # in this example by using the non-standard HTML attribute naming="yes"
        # it could have been added to any appropriate attribute
        #
        # If the designated naming attribute is multi-valued then only including
        # a single INPUT field for the attribute ensures no confusion but if entering
        # multiple attribute values is required then some visual indication (color, text)
        # should indicate the form item that is used as the naming attribute
        #
        # If an entry uses a multi-attribute naming value (cn=joe+sn=blogs)
        # the both should be defined with naming="yes" and the order in which
        # they appear in the form will determine the mutli-attribute construction
        # order when the DN is created

        <input type="text" naming="yes" name="uid" value="">

      </td>
    </tr>

    # since the sn attribute is MUST for inetOrgPerson it has been
    # highlighted using an appropriate styling (class="red") attribute
      <td align="right" valign="top"  width="200" class"red">Surname:</td>
      <td width="230">
        <input type="text" name="sn" value="">
      </td>
    </tr>

    <tr>
      <td align="right" valign="top"  width="200">Title:</td>
      <td width="230">

        # this illustrates the ability to prompt the user by suggesting
        # a specific value

        <input type="text" name="title" value="Lord of the Realm">

        # this illustates how required fields may be added to any entry
        # in this case every entry will add the attribute o (organizationName)
        # with the defined text (value=) to the entry

        <input type="text" name="o" value="Example, Inc.">
      </td>
    </tr>
    <tr>
      <td align="right" valign="top"  width="200">User Password:</td>
      <td width="230">
        <input type="password" name="userPassword" value="">
      </td>
    </tr>
    <tr>

      # a class color attribute has been added to suggest that this field while
      # optional (MAY) is desirable

      <td align="right" valign="top"  width="200" class="green">Email Address:</td>
      <td width="230">

        # this illustrates the ability to allow the user to add multiple values
        # for designated attributes where this is either normal or expected
        # in this case a total of 4 INPUT boxes will be created
        # the first will be populated with a prompt (your-name@example.com
        # the additional 3 will be empty
        <input type="text" add="3" name="mail" value="your-name@example.com">
      </td>
    </tr>
    <tr>
      <td align="right" valign="top"  width="200">Employee Type:</td>
      <td width="230">

        # this illustrates the power of the SELECT tag to limit choices,
        # remove spelling errors, fix case issues, and so on

        <select name="employeeType">
          <option value="human" selected>Approximately Human</option>
          <option value="almost">Almost Human</option>
          <option value="borg">Barely Human</option>
          </select>
      </td>
    </tr>
    <tr>
      <td width="200"></td>
      <td width="230">

        # clicking the submit button will add this entry

        <input type="submit" name="Submit" value="Submit">

        # the Reset button will remove all edits and return the template to
        # its original state

        <input type="reset">
      </td>
    </tr>
  </table>
Notes:
Create Entry Templates, in general, should not be stored in the subdirectory for their objectClass. Instead they should be stored in a subdirectory whose name is not (or is unlikely to ever) be an objectClass (all the sample LDAPviewer Create Entry Templates are stored in the subdirectory zzz. (This is not an application requirement but a technique used to avoid the creation template ever appearing in the HTML Editor Template Menu if it is not required.)
The HTML option tag (used within a select grouping) is unique in that it returns a value invisble to the user. The value can be used to optionally supply multiple parameters. This can be especially useful when using a form to create one of a number of different entry types (each based on a different objectClass) or select one from a number of AUXILIARY objectClasses. The generic form of this optional extension is: <option name="[X]attribute-name" value="V">User-visible</option> # X may be ! indicates any other-value if present represents and objectClass and is added to the objectClass attribute # V has the syntax attribute-value[~other-value] # where ~ is a literal and if present signifies the presence of other-value # examples: # no extension value <select name="!faculty"> <option value="sc">Science</option> </select> # with extension value <select name="!faculty"> <option value="sc~scienceFaculty">Science</option> </select> # in this case scienceFaculty will be added to the objectClasses for the new entry
Notes:
Display Templates simply display the contents of any entry, they do not allow attribute editing. Display Templates use a non-standard HTML tag to trigger their activity and can be included prior to any FORM tag indicating the presence of an Edit or New Entry Template.
An annotated Display Template is shown illustrating the major features:
# HTML document start is as defined for Edit Templates
# and may be preceeded by any HTML eye-candy required
<html>
<head>
<title>Simple view: displays all attributes.</title>
<style type="text/css">
<!--
h1 {  font-family: Arial, Helvetica, sans-serif; color: black}
body {  font-family: Arial, Helvetica, sans-serif; background-color:#F0F8FF;color:black;}
.red {color:red;}
.blue {color:blue;}
.white {color:white;}
-->
</style>
</head>
<body>
<h1>Displaying All Attributes in Entry</h1>
# the non-standard <display-tag (lowercase) indicates the presence of the
# display template
# attributes="entry" or attributes="all" indicates that all attributes in
# the current entry should be displayed.
# If a specific attribute is required then a single "ldap-attribute-name"
# should be used. If multiple attributes are required a comma separated list should be used.
# Example attributes="mail,userPassword"
# The style="z" HTML attribute may take the value
# "list" (as shown) which displays the attribute name in a left hand table cell and
# all values in the right hand table cell. The value "plain" uses no formatting
# but displays the ldap attribute name on one line and all its values on successive lines.
<display-template attributes="entry" style="list">

</body>
</html>
Display Templates when using either style="list" or style="plain" will hyperlink (enclose in an a (anchor) tag) the following attribute values:
DNs. Any DN appearing in the value field can be clicked causing that entry to read as long as it is in the name scope of the current DIT.
Mail Address. Any mail address appearing in the value field can be clicked causing a locally configured mail client to be loaded.
Web URLs. Any web URL (beginning http:// or https://) appearing in the value field can be clicked causing that page to be displayed.
Standard HTML techniques can used to enhance the user experience and while the HTML variant is 3.2 > 4.0 which may seem rather primitive by modern HTML 5 standards (most notably at this time they lack javascript support) but are still capable providing an enhanced user experience such as graphics and images, visual accentuation with CSS styling, menus and textual content. The following snippets from templates distributed with LDAPviewer, while in no sense seeking to suggest they are optimal or even good ernonomic practise, may help to stimulate the designer's imagination.
Where necessary some even use multi-level menu bars.
Navigation page menus.

© LV Project 2016. Creative Commons Attribution 4.0 International License.